Before The Telemedicine Session
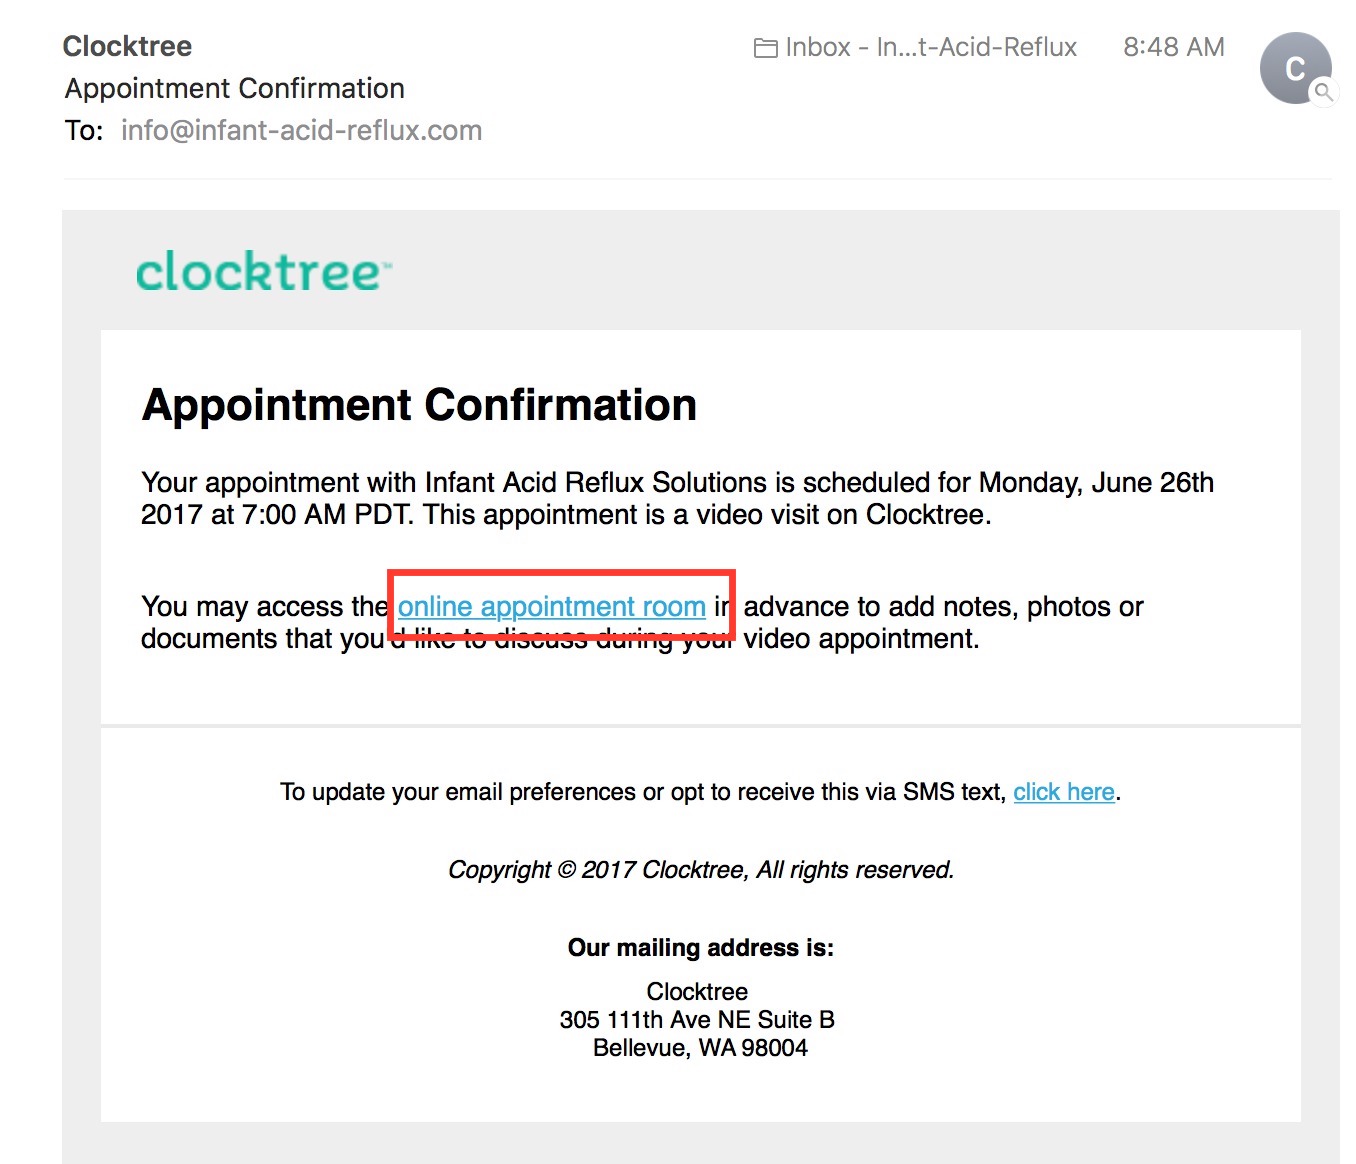
- You will receive an email with a link to your telemedicine appointment.
- You should save this email for the day of your appointment.
- Here is what the email will look like. Click on the shown below, highlighted in red.
- The link will take you to your appointment screen.
- You can test this right away and play around in the interface. It might be a good idea to do that before your appointment.
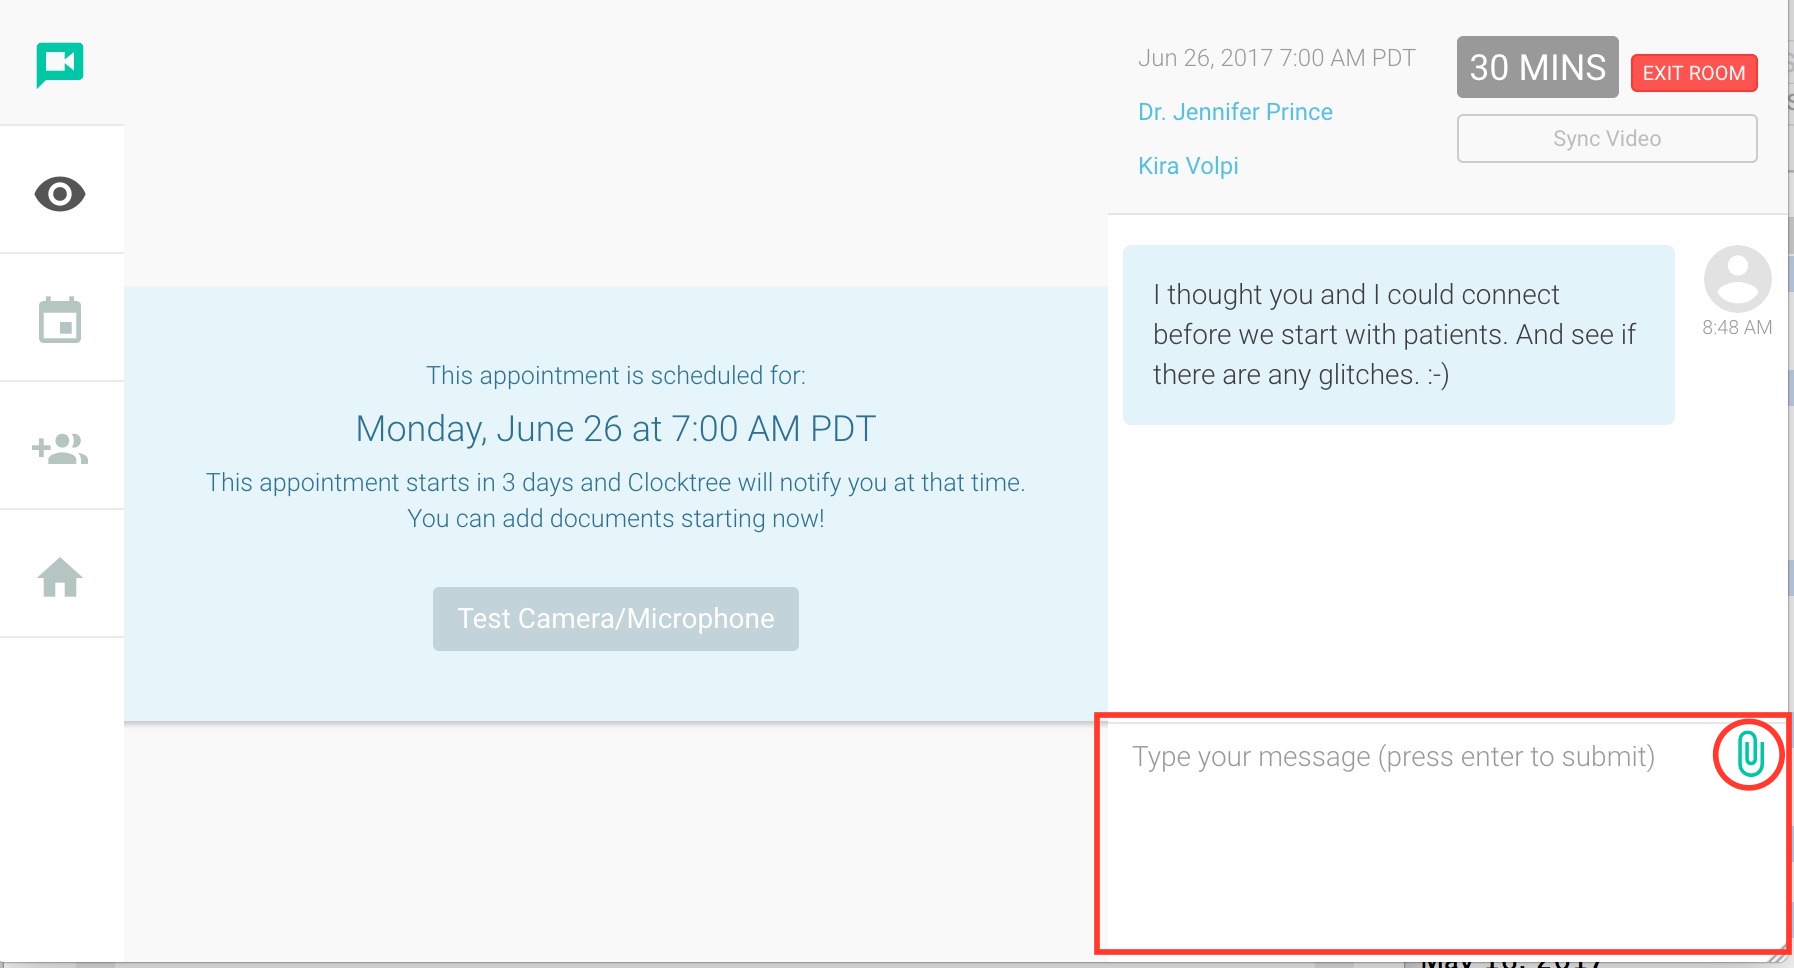
- Here’s a view of your appointment screen.
- Test Camera/Microphone by clicking the link shown here circled in red.
- A popup screen will appear that looks like the screen shot below.
- By clicking allow (circled in red), the interface will access your computer microphone and camera and allow you to test them both.
- If everything is functioning as intended, the screen below will appear and you’ll see your beautiful face!
- You will also see the video camera icon in red on the top left of your screen.
- Your next step should be to test the audio.
- Click the link we've circled in red below that says "Audio Test".
- A voice will walk you through an audio test by asking you to count from one to ten.
- Then it will play the audio back and confirm.
- If test is successful you can close the screen by clicking the link circled in red that says "Close".
- Now let's go over the text and add file features.
- The screen shot below is highlighted in the lower right hand corner. This is where you’ll be able to type any correspondence.
- Just type your message in the box we've shown here in the red box and hit enter.
- All text messages are archived and saved!
- Once you type your message and click enter you will see the response above as shown here.
- HERE IS WHERE YOU NEED TO COPY & PASTE QUESTIONNAIRE RESPONSE THAT YOU RECEIVED. Just copy the email contents and paste them into the message area and hit enter. They will appear in the message area for your appointment.
- The next feature is adding files. HERE IS WHERE YOU'LL ADD YOUR PATIENT INTAKE FORMS.
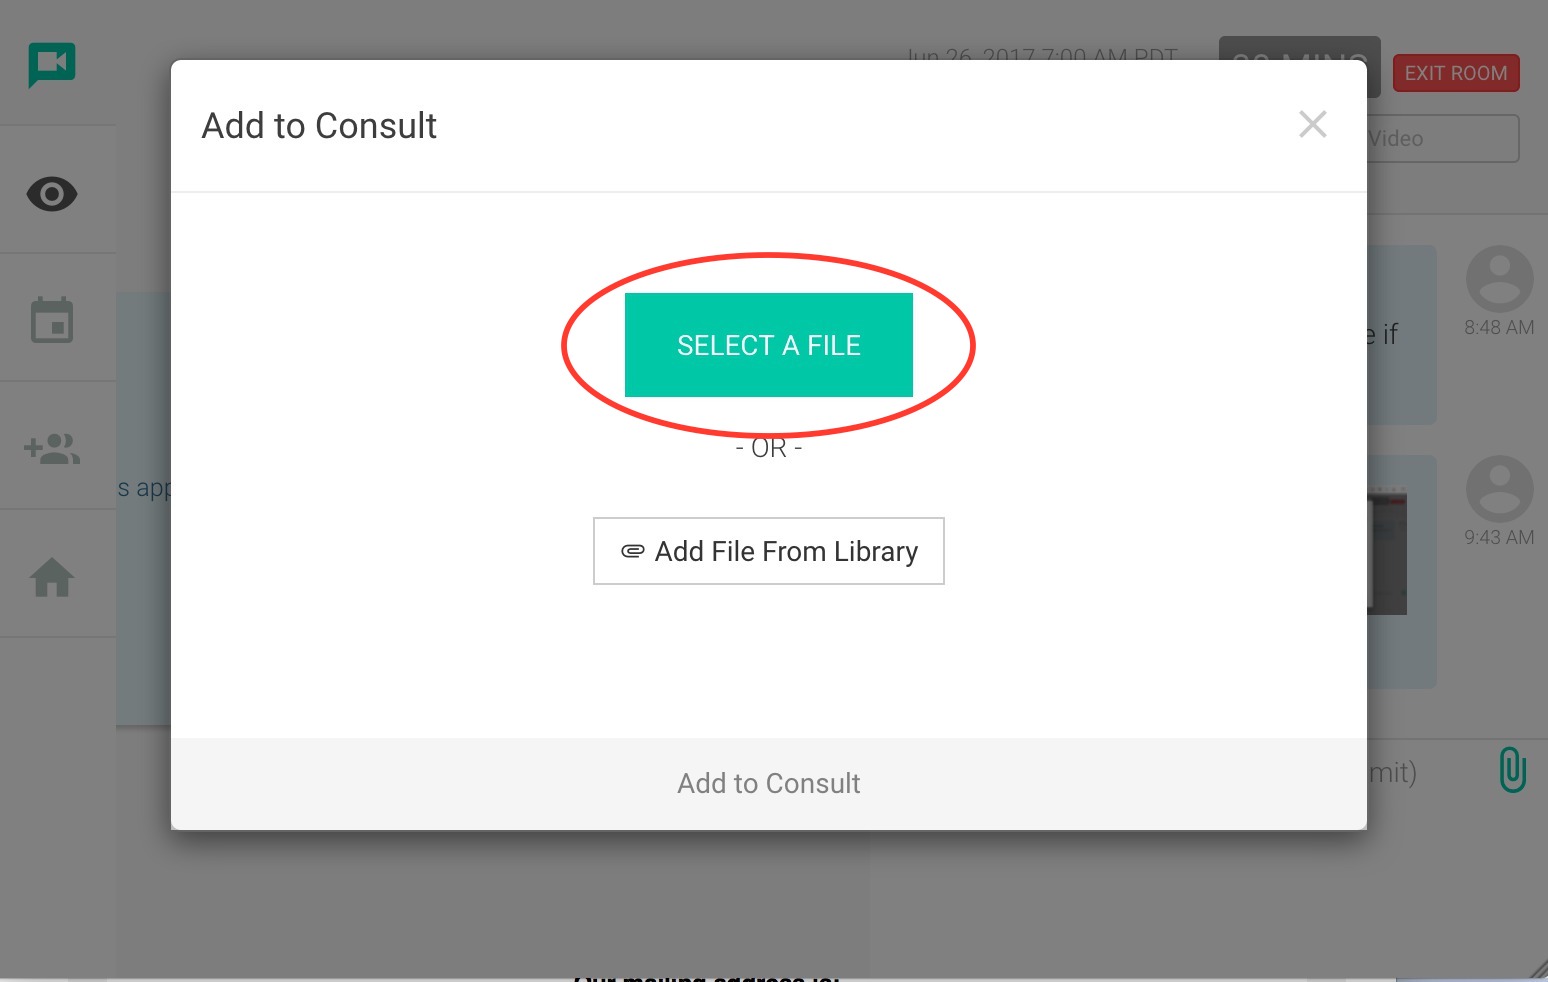
- Or any other files or images you want to share by clicking on the paperclip icon shown here circled in red in the lower right corner of the screen.
- A pop up screen will appear and you will click “Select File”.
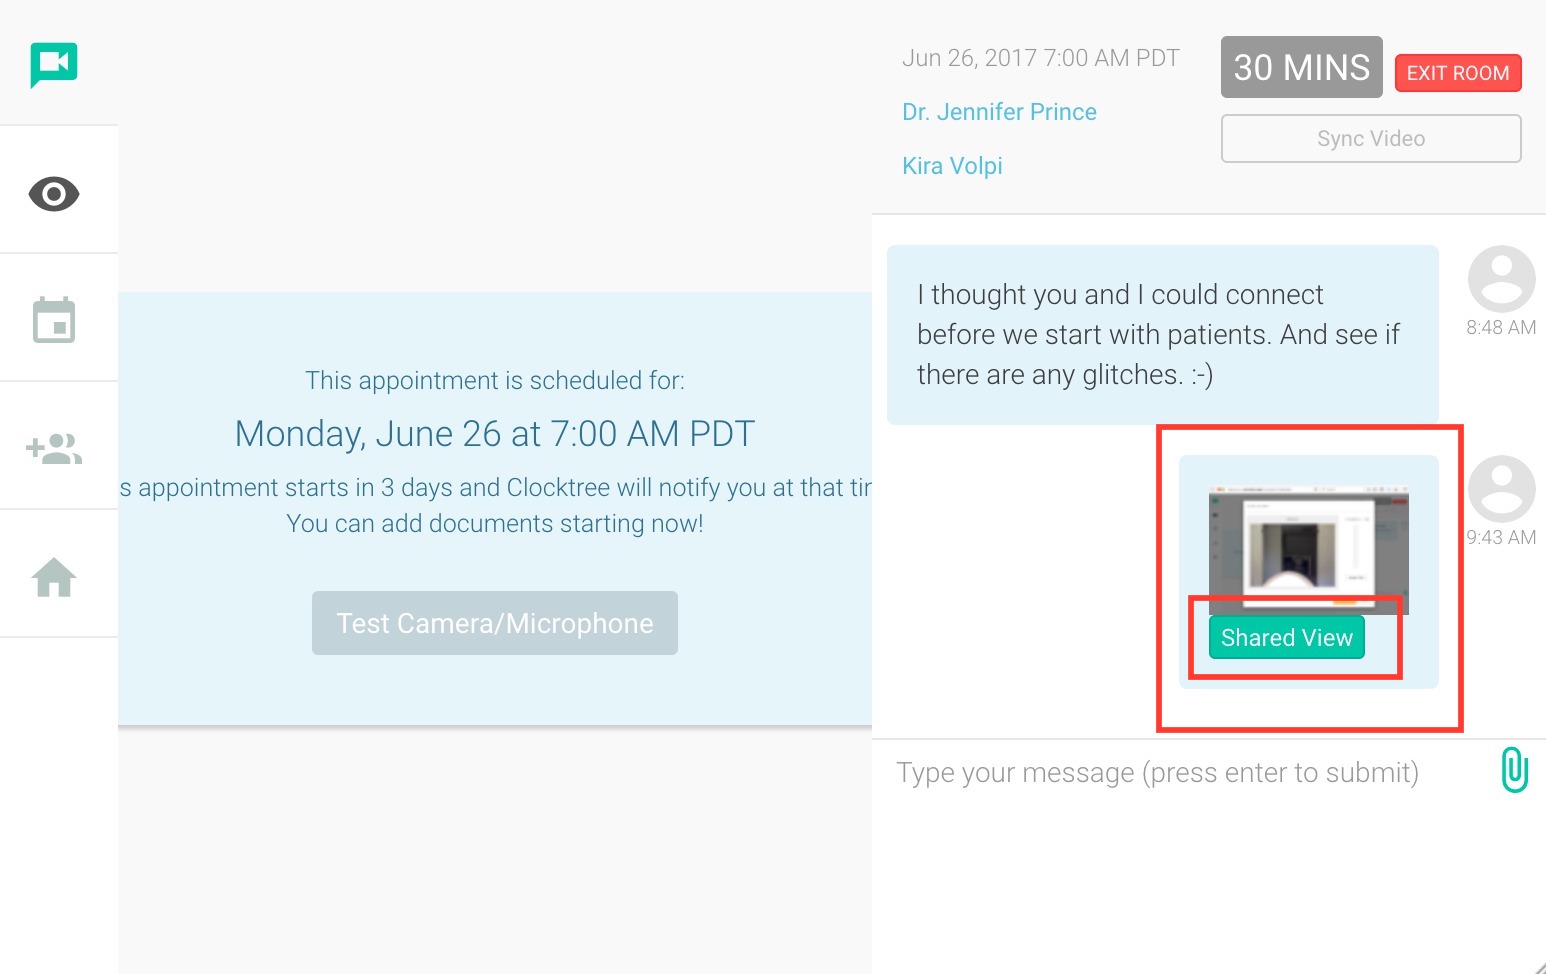
- Once you’ve added the file and hit enter the file will be added to the IM conversation.
- It will look like this screen shot below.
- You will need to click “Shared Video” to allow the doctor to see the file.
- At the end of the telemedicine video consultation you can click “Exit Room” as shown below and that will end your session. NOT NOT CLICK THAT ICON UNTIL THE END OF THE SESSION. Doing so will end the meeting permanently.
- If you have any questions about any of the instructions please email us before your appointment.
- The interface responds best on Chrome. However, we've tested on Firefox and Safari and it's worked.
- If anything fails during the appointment, please use the link provided in the email to reconnect or refresh your page.
- If anything fails and you are not able to get back online, please do not panic. Email us right away. We will get you in touch with the physician either by phone or reschedule you at no additional cost. We will make sure you are taken care of. We promise!
Return to Scheduling Your Doctors Appointment Instructions